|
Q) What is happening in this photograph?
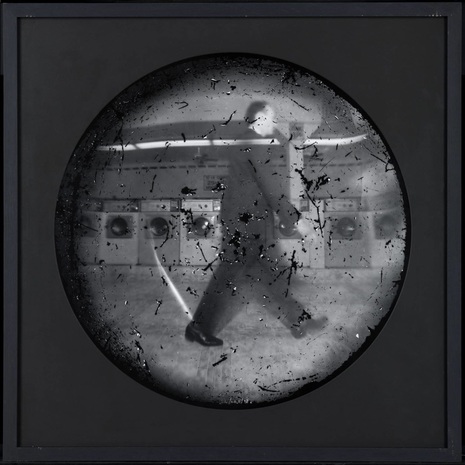
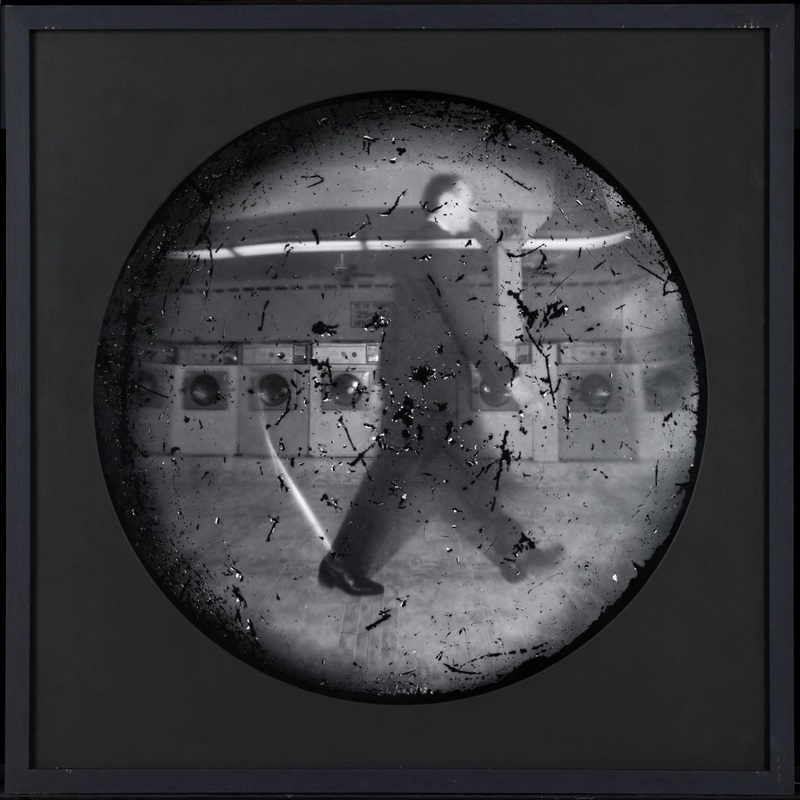
A) It looks like a man walking through a launderette taking long strides. Q)What can you see in the background? A) Washing machines Q)Why is the image circular? A) Because this photo was took inside a washing machine Q)How could you explain the marks on the surface of the print? A) It could be dust which has shown up on the image or maybe it could be scratches on purpose so again it looks like a washing machine window Q)Why is the image darker around the edges? A) I think it is darker because it it made from a washing machine so the glass is thicker Q)Why is the figure partly transparent (see-through)? A) Because of the shutter speed. Q)How do you think the photographer made this picture? A) I think the photographer used a normal pinhole camera but tried to make it look as if it was took inside a washing machine. Q)If you could speak to the photographer, what would you ask him? A) Why did you take this photo in a launderette and does it tell a story Q)What title would you give this photograph and why? A) A Walk In The Launderette. I would call it this because he is walking through a launderettes. |
HOW TO MAKE A PINHOLE CAMERA:
1) Gather equipment - box, photo paper, thin piece of metal (foil), tape, scalpel, needle/pin
2) Make the pinhole - poke a needle/pin through the piece of foil to make the 'lens'
3) Make the camera box - The box must be light proof. The only light comes through the pinhole. Make sure there are no holes or openings in the box. Seal it and cut a small square opening in the box for the pinhole to go in.
4) Make the shutter - Tape the piece of foil behind the already cut square. To make the shutter you can use a flap of paper and tape to cover the pinhole completely.
5) Load the paper - This must be done in the pitch black. Tape a piece of paper on the opposite side to where the pinhole is and put the lid on and make sure the shutter is shut (so no light is entering). Go back into the light to finish the procedure.
6) Taking the picture - Point to camera to you object you are photographing. Open the shutter for 30 seconds - 4 minutes depending on the lighting. Everything must stay still. go to a dark room to develop your picture.
7) Developing - To develop an image you will need developer, fixer, water, tongs, towels and an appropriate light for your darkroom. The paper from the box will be a negative to make the positive put another piece of photo paper under the developed negative face to face. The negative must be on top. Use a piece of glass to press them together and turn the lights on for a few seconds. Make sure your extra photo paper is safe and covered or it will all develop black. Now develop the positive. It goes in the developer then water then fixer then water then air dry.
Q) What are the names of the chemicals used to create an image in the darkroom
A) The three main chemicals used for developing photos are developer, stop bath and fixer.
Q) How do the chemicals develop the image (explain in depth what happens)?
A)
Q)Describe the step-by-step's from unloading the pinhole camera to presenting final outcomes
A)
Q)What safety measures do you need to take when working in the darkroom?
